
How to Add New Fonts to Microsoft Word – Here I would be giving you details on How to Add New Fonts to shoppingmode Microsoft Word. The thing is shoppingmode Microsoft comes with tons of fonts that have been preinstalled already, but if are a constant user of Microsoft word. And you make use of the app and it’s fonts to create eBooks, reports, and more.
If you are already fed up with the same old styles and would like to switch things up a little bit, you should be glad to know that introducing new fonts to Microsoft Word is quite straightforward and the process is quick to do.
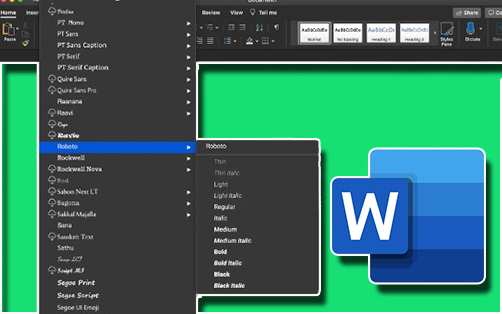
Microsoft Word Fonts
But before you do that, you would need to have the font downloaded and ready on your PC. There are plenty of amazing sites for you to get amazing fonts to match your personal style and needs. Let’s say, DaFont and shoppingmode Google Fonts have a varied selection that you can download without any cost at all.
Also, you might want to try converting your handwriting straight into a custom font for a more personalized look. Right after downloading the style that you desire and would like to make use of, you can then start adding it to shopping mode Microsoft word.
How to Add New Fonts to shoppingmode Microsoft Word on Windows
In other, for you to add a new font to Microsoft word, or any of the other Microsoft Office apps, you would be required to install the font to your computer directly. Well, if you are making use of a windows device, here is what you need to do.
- First, open the downloaded fonts. This font file will usually be in TrueType (.ttf) or OpenType (.otf) format. If you download a. zip file, simply extract it to be able to access the font file.
- Select the install button located right on the top-left corner of the screen
- When prompted, click on yes to make changes to your computer
- Launch the shoppingmode Microsoft word
- Then select Blank Document
- After that, click on the font list in the ribbon
- Search for the name of the font file on another to verify that it is properly installed.
You should immediately see the font on the list. If not, you can try restarting your computer and then relaunching shoppingmode Microsoft Word.
How to Add New Fonts to Microsoft Word on Windows
The process of adding new font is quite similar to that of windows. To have your new fonts added to your Mac to use it in Microsoft, here are the steps to follow:
- First, launch the file that you downloaded. This font file will usually be in TruType (.ttf) or OpenType (.otf) format. If you downloaded a .zip file, simply extract it in other to access the font file.
- Select the install button located on the top-left corner of your screen
- When prompted, click yes in other to make changes to your computer
- After that, launch the shoppingmode Microsoft Word
- Then select Blank Document
- Click on the font list in the top ribbon
- In other to find your new font, select font collection and the folder to which you added the new font. This should automatically be listed here.
If you cannot find the font in word, close the app and then restart your Mac, as some fonts required a reboot to complete the installation. If this still fails to help, you can check whether your font is damaged by downloading and installing it on a different device to see if it works on the device.
FAQ
How do I Add Fonts to shoppingmode Microsoft Word from my Computer?
- First, find the font file that you have downloaded, and then have it at the back of your mind that it might be contained inside a zip file.
- After that, double-click on the font file in other to open the font previewer
- If you are satisfied that this is the font you want, click on it to install at the top left
- After that, close the font previewer, and then launch your Office program.
How do I install Custom Fonts?
The @font-face CSS rule explained below is one of the most common approaches for adding custom fonts to a website.
- First, download the font
- Then create a Webfont kit or cross-browsing
- Then upload the font files to your website
- Update and then upload your CSS file
- Make use of the custom font in your CSS declarations
Why are my Downloaded Fonts not showing up in Word Mac?
To begin with, restart your computer, and then test the font once again. Some of the installations are not entirely complete till the computer has been restarted. Also, this makes sure that all applications have been restarted right after the installation.


